Issue licenses
You can issue licenses to customers by issuing product licenses or feature licenses.
This means either using a product configuration you have already created, or specifying the product and features for a license on the fly.
When issuing a license, you can choose whether to generate a license key that will be used for consuming the license.
With a feature license that has seats, the system applies a default built-in license model that allows a user to use your application on only one device at the same time per seat (every new device that is active concurrently uses another seat from the license). The default license model doesn’t limit how many seats a user can use from the license at the same time, nor how many application instances a user can run at the same time. See more about how concurrency rules are applied when the license is being consumed.
If you are issuing a trial license, you can configure it similarly to a standard license, but limit the validity of the license to match the trial period. If your customer decides to purchase the full license during or after the trial period, you can extend the validity of the existing trial license, instead of creating a new license. However, if the trial and standard licenses offer different features, you must issue them as separate licenses.
Using the 10Duke Scale License Management API, you can also issue licenses using activation codes.
Before you start
-
If you plan to issue product licenses, make sure you have created the products and product configurations needed.
-
If you plan to issue feature licenses, plan the products and features you will use in the licenses with care.
Plan your product structure, including the different sets of features needed per product if you will be issuing different kinds of licenses for the same product. Plan the naming convention for the products and features.
-
If you plan to use version constraints to restrict which application versions a particular license allows to access, it’s important to note that the version check is done lexicographically.
A lexicographic check means that, for example, if a license allows the version range 1.0.0-3.9.9, application version 2.0.1 is allowed, but versions 0.9.0 and 4.0.0 are not allowed. However, when your application reaches version 10.0.0, this range would allow that version as well.
This means you need to use “padding” in the version range if your product versioning requires it—in the above example case, you could define the range as 01.000.000-03.999.999.
To make sure your version constraints can handle all your future application versions correctly:
-
Consider in advance all the likely ranges you may have of the major, minor, and build version numbers in a semantic or other numerical version number.
-
Reserve the expected range by adding the necessary number of padding digits to the version range, both in the version constraints you specify in licenses and in the formatted parameter that your application sends when consuming licenses.
-
-
It’s important to be aware that after issuing licenses, most of the information in the licenses is fixed and cannot be edited. If, for example, your products or features change and the changes also need to apply to existing licenses, you will need to revoke licenses and issue new ones as needed.
Issue a license in the UI console
The steps for issuing a product or feature license in the UI console are very similar.
When you issue a license in the UI console, it is placed in the customer’s default license container.
Issue a product license in the UI console
-
In the left sidebar, go to LICENSING > Customers. The customer list opens.
-
Click the three-dot menu for the customer that you want to issue a license to, and select Licenses. The list of that customer’s licenses opens.
-
To issue a license using a preconfigured product, click Start in NEW PRODUCT LICENSES.

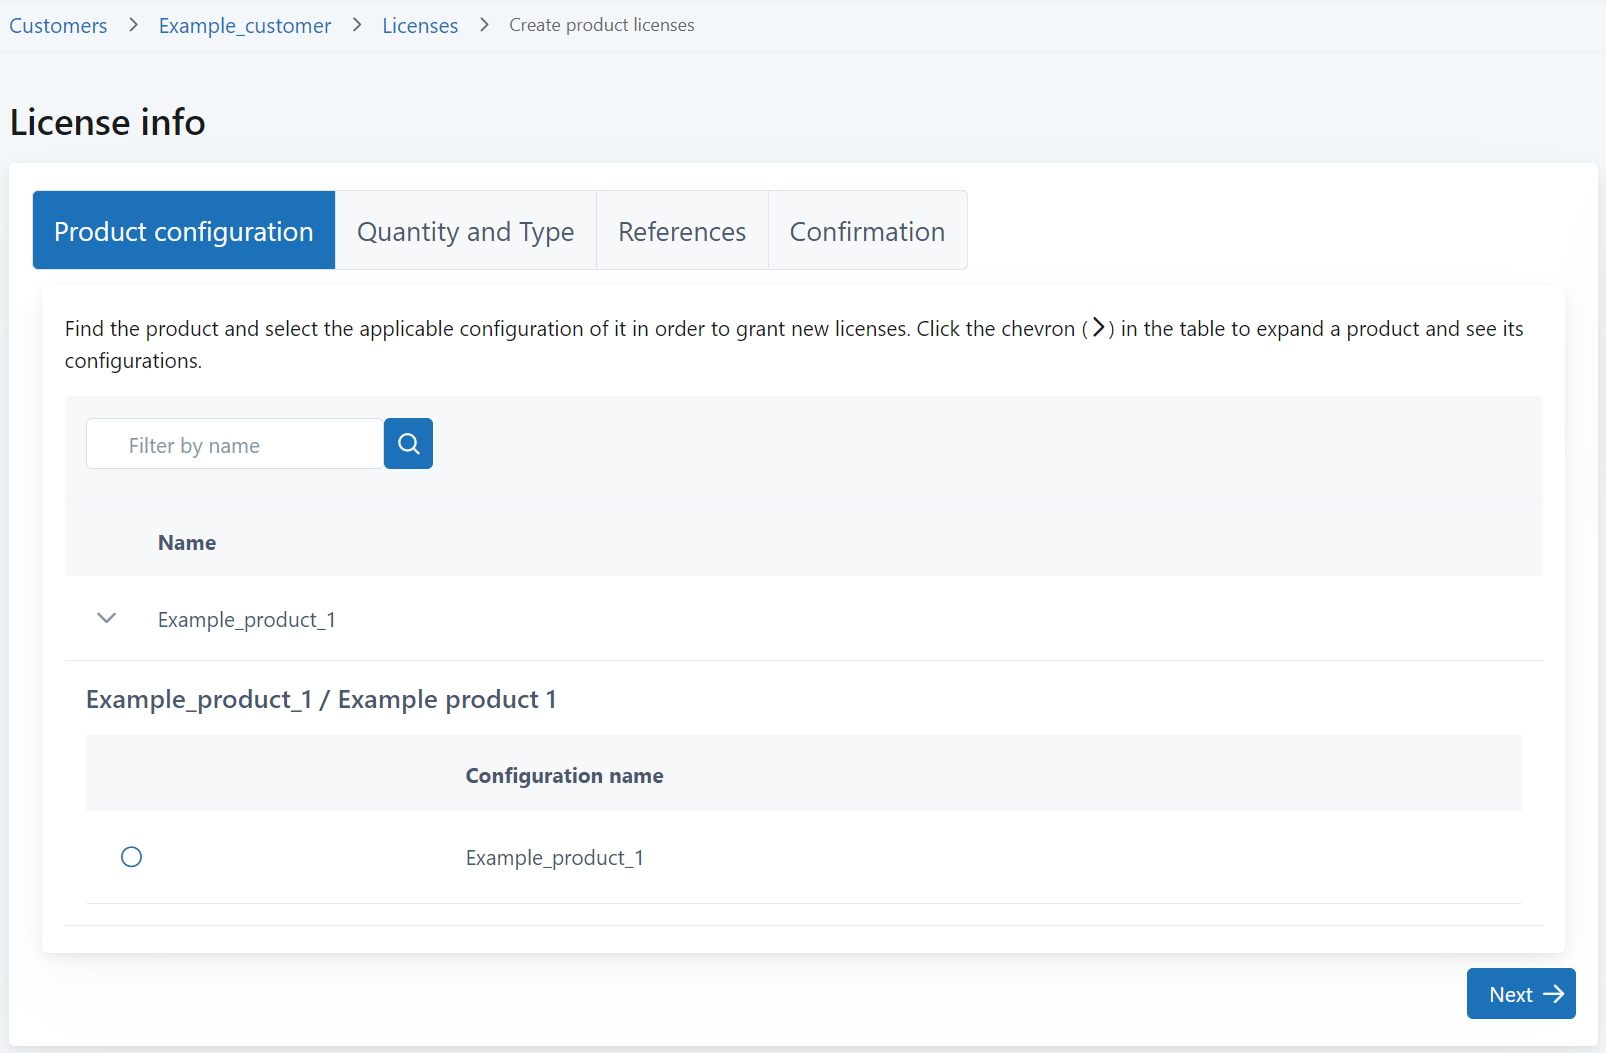
The License info form for a product license opens.
-
On the Product configuration tab, select the product configuration to use and click Next.
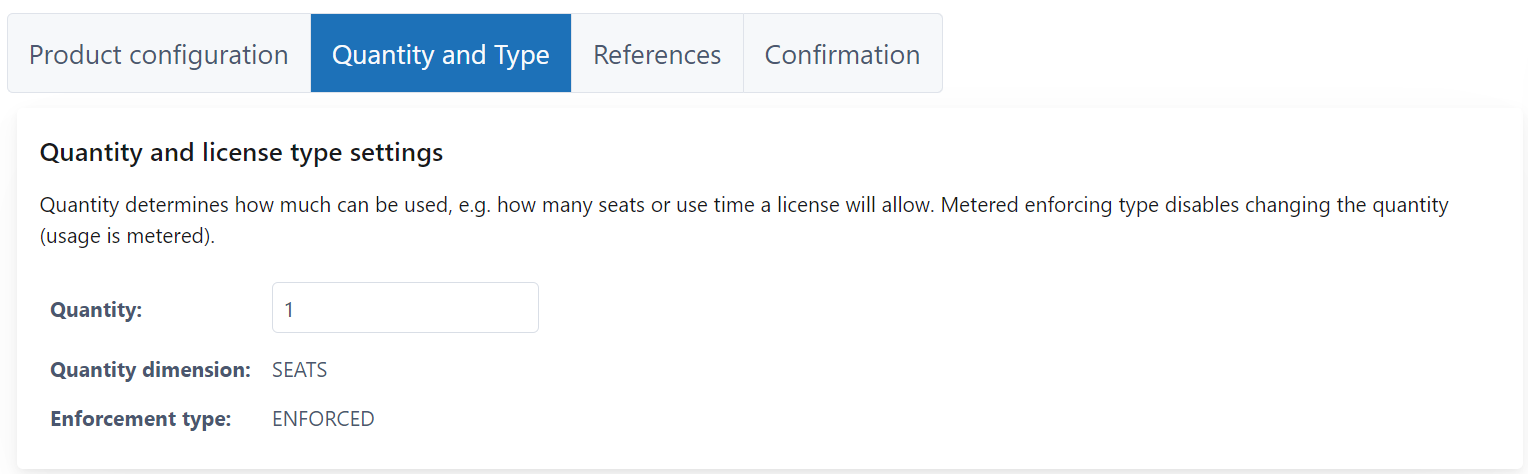
In the next steps, on the Quantity and Type tab you proceed to define license settings such as the license quantity, validity, and allowed versions, and select whether to generate a license key.
The product configuration you just selected determines the quantity type for the license (seats, use count, or use time), and whether license consumption is enforced or metered.
-
In Quantity and license type settings:
-
If Consumption type is Enforced, define the quantity granted in the license in Quantity.
Depending on Quantity type, the quantity is either the number of seats (the maximum is 1000), the allowed use count, or the allowed use time (in seconds).
-
If Consumption type is Metered, the quantity is not limited by the license.
-
-
In Generate license key (optional), select whether to generate a license key for the license. If enabled, this will also automatically create a license consumer of type license key.
Note: If you generate a license key, this license can only be consumed using that license key. License consumers of type person or device won’t be able to consume it even if they have access to the license.

-
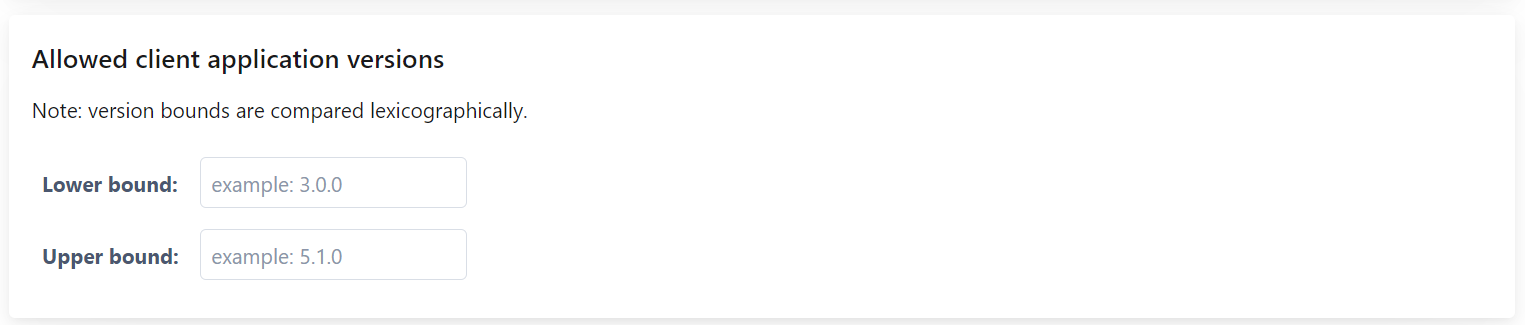
In Allowed client application versions (optional), define the range of client application versions that are allowed to check out the license. Include the necessary number of padding digits in the version range, if your product versioning requires it.
-
Lower bound: Define the lowest version for the allowed client application range. If you leave this empty, the version range does not have a lower bound.
-
Upper bound: Define the highest version for the allowed client application range. If you leave this empty, the version range does not have an upper bound.
-
Display name: Enter the display name for the version range allowed in the license.
-
-
In License validity, define the validity period of the license. The validity start and end times are set as UTC times.
-
Valid from: Define the start date and time. If you leave this empty, the start date and time is automatically set to the start of the current date in UTC time.
-
Valid until (optional): Define the end date and time (the last valid date). If you leave this empty, the license is valid indefinitely.
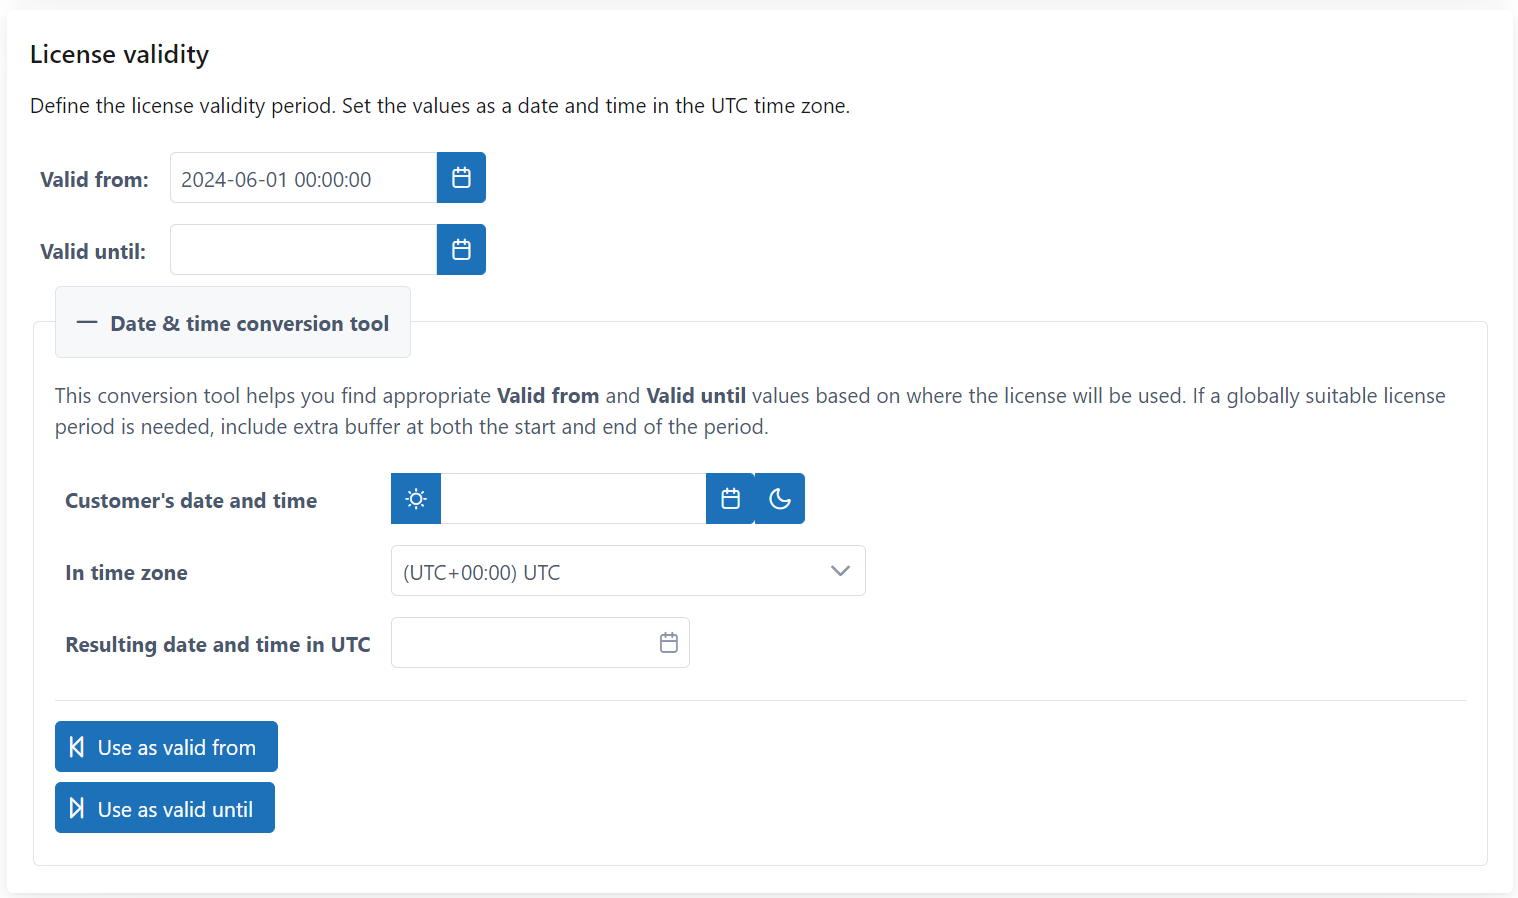
Instead of UTC time, you may want to set the validity start and end times to a specific customer time zone. For example, if your customer’s end users are in New Zealand, the customer will expect the validity to start already at the start of their local day.
Use the Date & time conversion tool settings to help you calculate appropriate dates and times for the Valid from and Valid until fields:
-
In Customer’s date and time, select the validity start or end time in the customer’s local time. You can also click the sun or moon icon to set the time to the start or end of the day.
-
In In time zone, select the customer’s time zone.
-
Now Resulting date and time in UTC shows the date and time converted to UTC time. Copy this time to the applicable validity field by clicking either Use as valid from or Use as valid until.
-
-
Click Next, and on the References tab, define optional external reference IDs and add optional notes if needed.
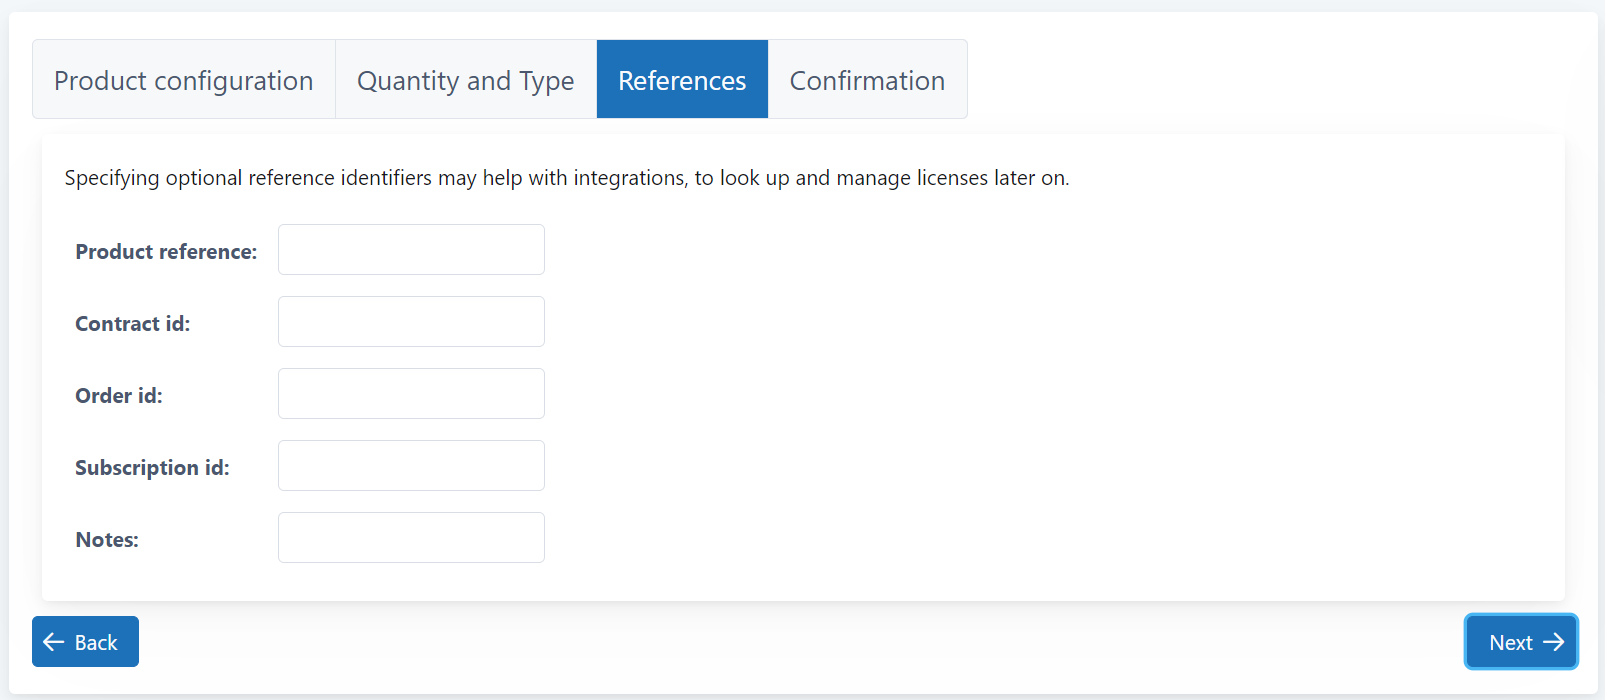
You can use the external identifiers for integration purposes to map 10Duke Scale licenses to records in other systems.
For example, Product reference would typically be set to a stock keeping unit (SKU) or other product identifier in your e-commerce or CRM system. If an event-driven integration is in use, the integration may fill in an external license grant identifier in External reference.
If Product reference is defined in the product configuration, the value is shown in the field. If Product reference is not defined in the product configuration, the field appears empty. You can manually enter or change the value in Product reference, but if navigating back to Product configuration and changing the product configuration to use, the manually entered value in Product reference is cleared.
-
Click Next, and on the Confirmation tab, review all the license details you defined and click Grant Licenses.
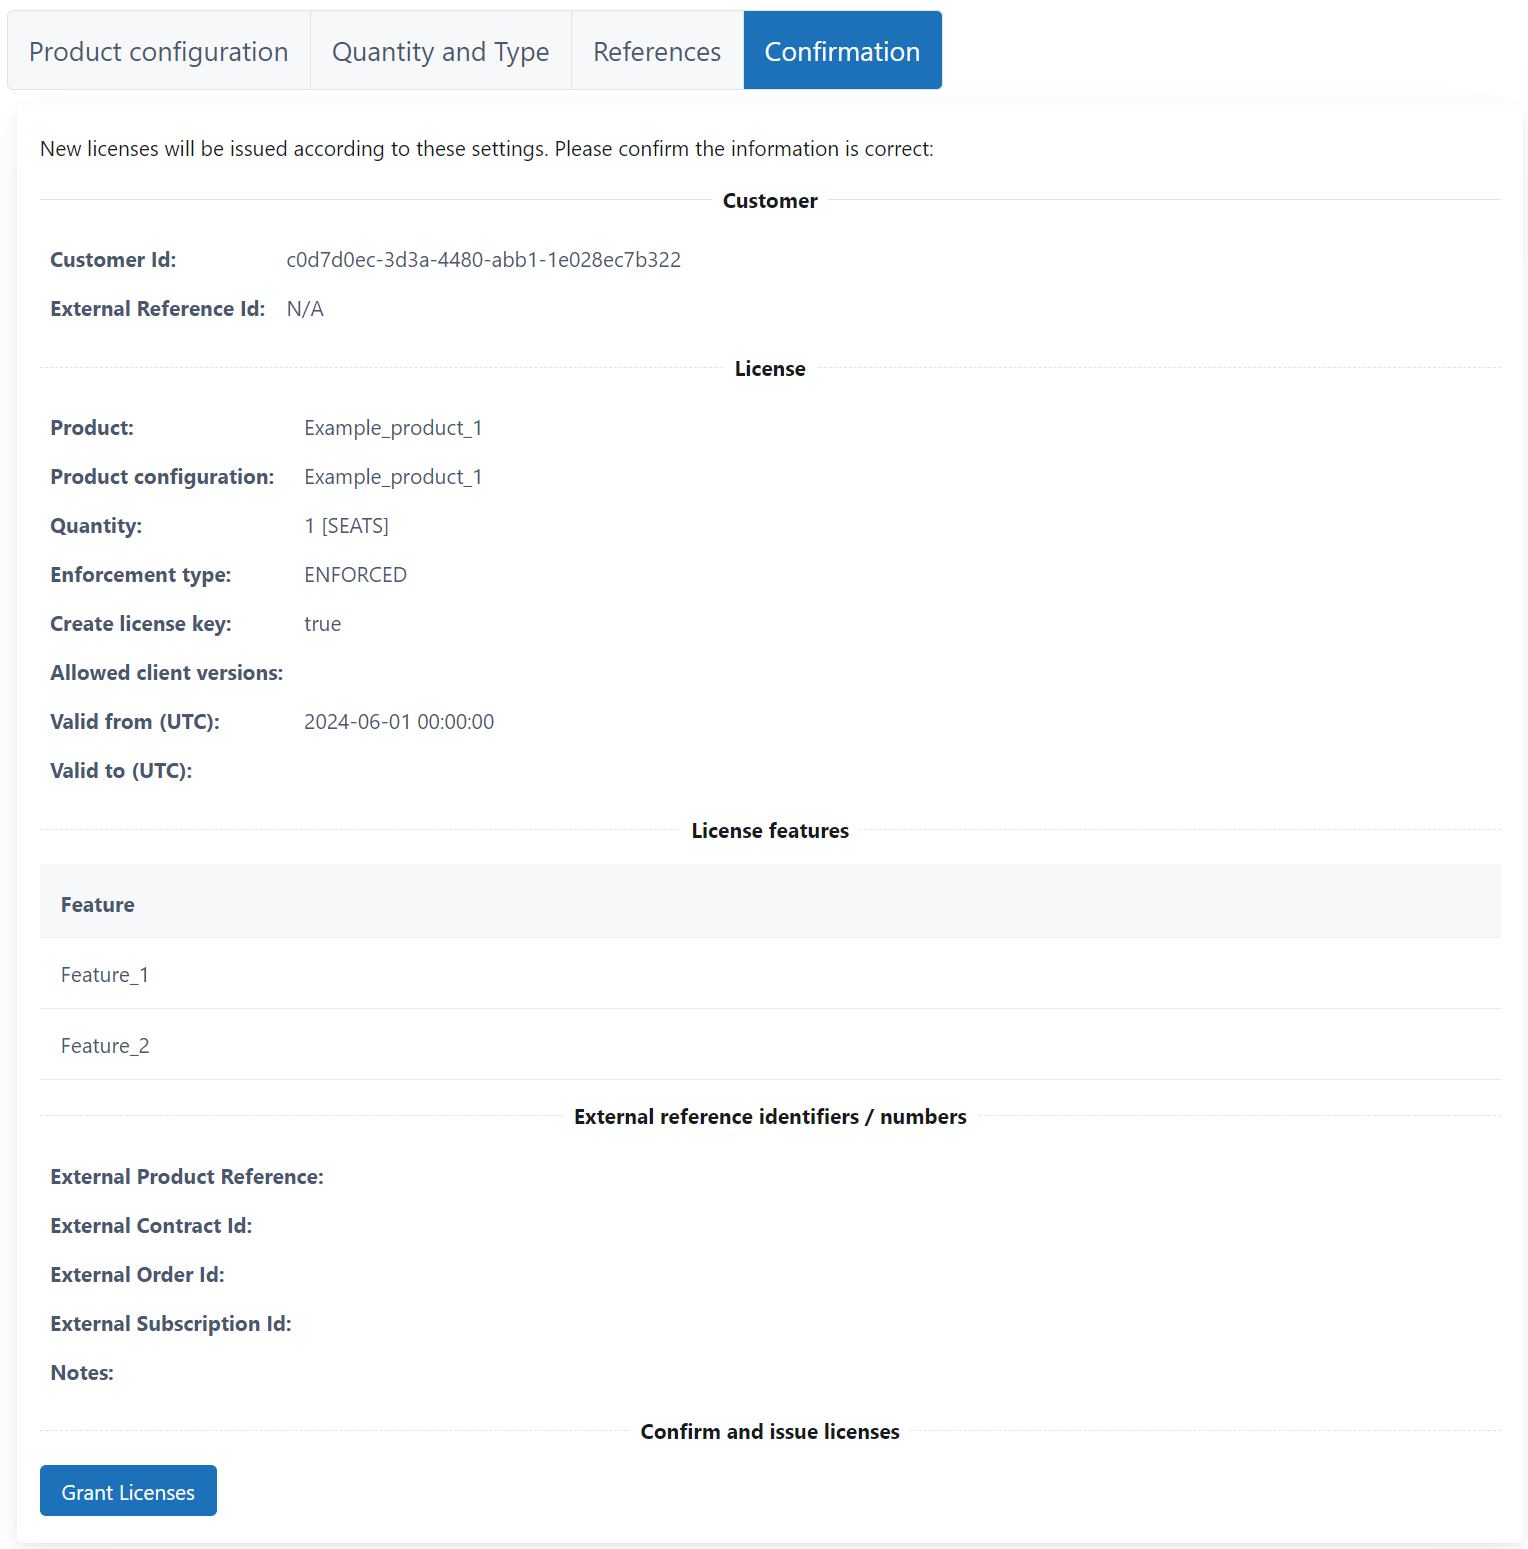
The next page displays all the license details, and you can click Print to print them.
Issue a feature license in the UI console
-
In the left sidebar, go to LICENSING > Customers. The customer list opens.
-
Click the three-dot menu for the customer that you want to issue a license to, and select Licenses. The list of that customer’s licenses opens.
-
To issue a license and define the product and features on the fly, click Start in NEW FEATURE LICENSES.
The License info form for a feature license opens.
-
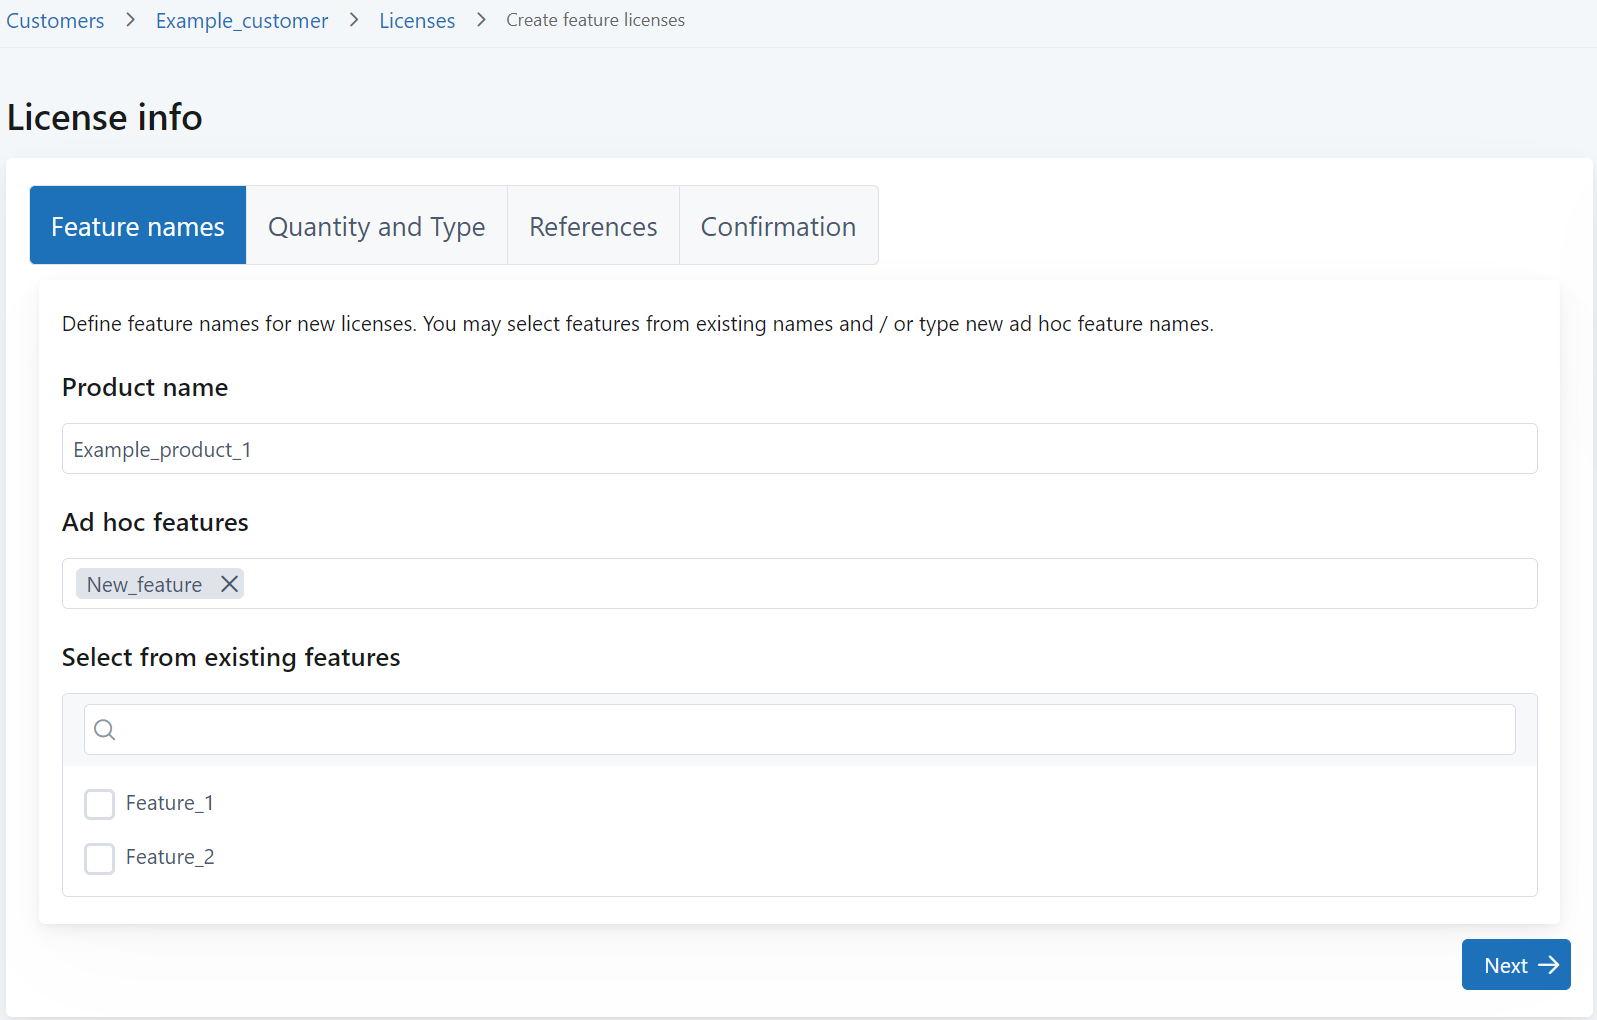
On the Feature names tab, define the product and features for the license.
-
In Product name, enter the product name.
-
Define what features are included in the license.
You can both define feature names manually and select from existing features used in your product configurations.
To manually define a feature name in Ad hoc features, type the name and press Enter to confirm it. To remove a feature name you entered, click the x in the name.
-
-
Click Next, and on the next tabs, define the rest of the license settings in the same way as with a product license (see above).
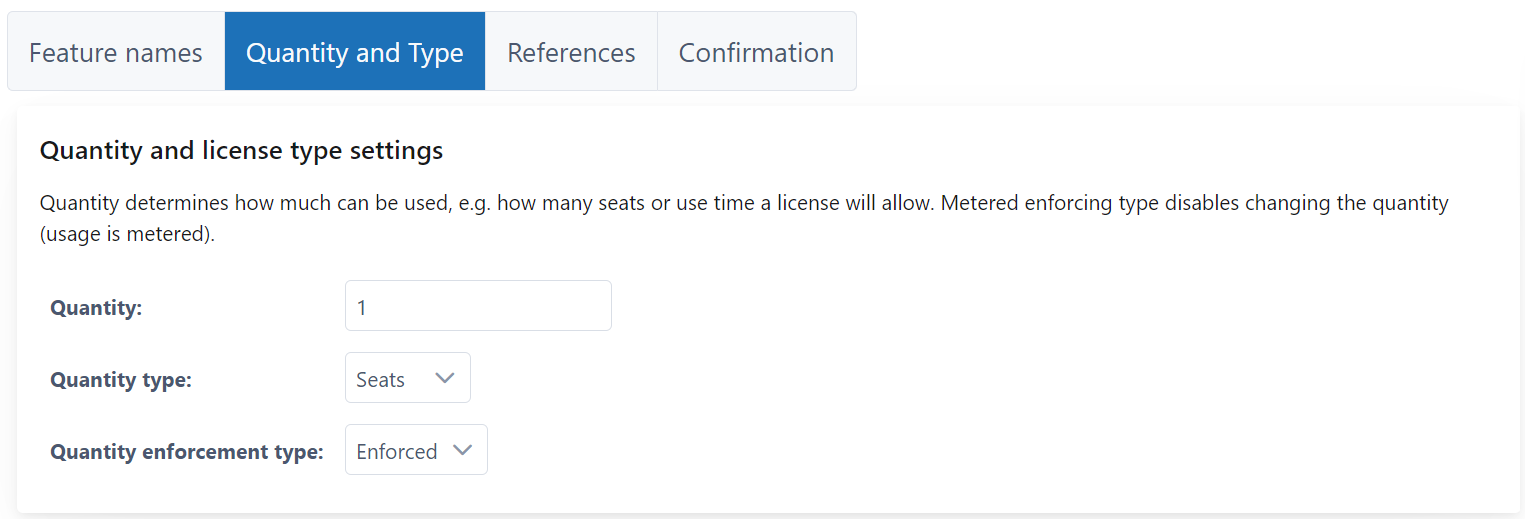
Define also these additional settings on the Quantity and Type tab:
-
In Quantity type, select the quantity type for the license: seats, use count, or use time.
-
In Consumption type, select whether license consumption is enforced or metered.
-
-
On the Confirmation tab, review all the license details you defined and click Grant Licenses.
The next page displays all the license details, and you can click Print to print them.
Issue a license through the API
You can issue both product and feature licenses through the API, and choose which license container the license is stored into.
Use the following License Management API operations:
| Operation | URL (relative, prepend the environment base URL) |
|---|---|
| Issue a new license using a product configuration | POST /licensees/{licenseeId}/licenses/actions/grant-by-product-config |
| Issue a new license and define the product and features on the fly | POST /licensees/{licenseeId}/licenses/actions/grant-by-name |
Next steps
-
Grant access to the license to license consumers as needed.
-
License consumers who have access to the license can start consuming it right away.